Easy Origami Jumping Frogs: Fun Paper Craft
Easy jumping frogs are surprisingly simple to make, and oh so much fun! Imagine a tiny, colorful frog, perfectly folded, ready to leap with just a gentle tap. These little guys are perfect for absolutely everyone, especially complete beginners and kids looking for a fantastic craft project. You can whip up a whole pond full of them in under 10 minutes each! In this tutorial, I’ll guide you step-by-step through the folds, showing you how to create these bouncy amphibians. We’ll focus on clear, easy-to-follow instructions so you’ll be making frogs that hop in no time. Let’s get our paper ready and create something amazing together!
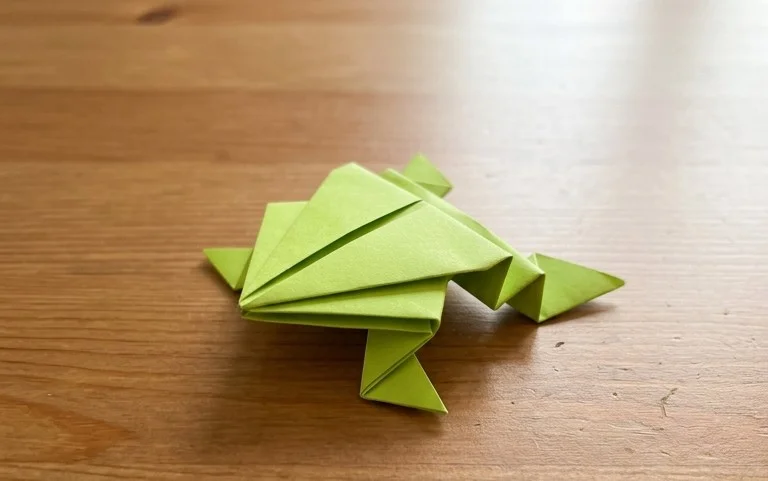
Easy Jumping Frogs: SO FUN!
Hello there, fellow paper enthusiasts! Today, we’re diving into a project that’s guaranteed to bring a smile to your face and a bit of playful movement to your desk: the easy jumping origami frog. These little guys are incredibly satisfying to make, and the best part? They actually jump! It’s a fantastic project for beginners, and I promise we’ll get through it step-by-step. You’ll be amazed at how something so simple can create so much fun.
Choosing Your Paper: The Foundation of Fun
Before we start folding, let’s talk about the star of the show: your paper. The right paper can make a world of difference in how easy your frog is to fold and how well it jumps. For this project, I highly recommend using standard origami paper. It’s thin enough to make crisp folds, strong enough to hold its shape, and usually comes in vibrant colours.
Type: Look for traditional origami paper. It’s usually made from kozo or mitsumata fibers, which gives it a nice texture and strength. Regular printer paper can work in a pinch, but it’s thicker and can make the later stages of folding a bit trickier.
Weight: For this frog, a standard origami paper weight, typically around 70-80 gsm (grams per square meter), is perfect. It’s light enough to allow for easy folding and movement, but sturdy enough to maintain the frog’s structure.
Size: A good starting size is 6 inches by 6 inches (about 15 cm by 15 cm). This size is manageable for beginners, and the resulting frog will be a satisfying size to handle and display. You can certainly go bigger or smaller, but this is a great sweet spot for your first few frogs.
Single or Double-Sided: For this jumping frog, I personally prefer using single-sided origami paper. This means one side is coloured, and the other is white. When you fold the frog, the white underside will peek through in certain areas, creating a nice contrast that highlights the folds. However, double-sided coloured paper can also look fantastic, giving your frog a uniformly bright appearance. It’s really up to your aesthetic preference! If you’re using patterned paper, make sure the pattern you want to show is facing up when you begin.
The Essential Base Folds: Building Blocks for Your Frog
Every origami model, including our jumping frog, is built upon a few fundamental folds. Mastering these will make all your future origami adventures much smoother. We’ll need two key bases:
The Square Base (or Preliminary Fold)
This is a foundational fold that’s used in many origami models. It’s essentially creating a series of creases that allow you to collapse the paper into a more manageable square shape with four flaps.
- Start with your square piece of paper. If you’re using single-sided paper, place it white side up.
- Fold the paper in half diagonally, bringing one corner to meet the opposite corner. Crease firmly. Unfold.
- Now, fold the paper in half diagonally again, bringing the other two opposite corners together. Crease firmly. Unfold. You should now have an “X” crease mark on your paper.
- Flip the paper over so the coloured side is now facing up.
- Fold the paper in half horizontally, bringing the bottom edge up to meet the top edge. Crease firmly. Unfold.
- Fold the paper in half vertically, bringing the left edge over to meet the right edge. Crease firmly. Unfold. You should now have a “+” crease mark on the coloured side and an “X” on the white side.
- Now for the magical part: pick up the paper. Gently push the left and right sides inwards along the vertical crease. As you do this, the top point should naturally come down towards the bottom point. Flatten the paper into a square. This is your Square Base. You’ll have two flaps on the left and two on the right.
The Frog Base (or Waterbomb Base)
This base is what gives our frog its distinctive shape. It’s built upon the Square Base.
- Start with your Square Base, making sure the open end (where all the flaps meet) is pointing towards you.
- Take the top layer of the right flap. Fold the right edge of this flap inwards to meet the center vertical crease. Crease firmly.
- Repeat with the top layer of the left flap: fold the left edge of this flap inwards to meet the center vertical crease. Crease firmly.
- Now, fold the top triangular point downwards, creasing it along the horizontal line where the two previous folds end. Crease firmly. Unfold these last three folds you just made.
- Flip the entire model over.
- Repeat steps 2-4 on this side. Fold the right edge of the top flap to the center crease, then the left edge to the center crease. Fold the top point down and then unfold these three folds.
- You should now have creases that look like a kite shape on each side of your Square Base.
- Now, we’re going to collapse this into the Frog Base. With the open end pointing towards you, take the right flap. Lift the right edge and essentially “open” it up, using the creases you just made to guide it. The goal is to bring the right edge of the flap down to meet the center crease, and in doing so, flatten the paper into a diamond shape. The side edges will come inwards.
- Repeat this process with the left flap, lifting the left edge and bringing it down to meet the center crease, collapsing the paper into a diamond shape.
- Flip the model over and repeat steps 7 and 8 on the other side. You should now have a diamond shape with two flaps on the top and two on the bottom. This is your Frog Base!
Your Jumping Frog: A Step-by-Step Folding Sequence
Now that we have our bases down, let’s bring our frog to life! We’ll continue from the Frog Base, with the open end pointing towards you.
- Make sure the frog base is oriented so that the two “legs” (the points where the flaps meet) are at the bottom.
- Take the top layer of the right flap. Fold the bottom edge of this flap upwards to meet the top point of the diamond. Crease firmly.
- Repeat with the top layer of the left flap: fold the bottom edge of this flap upwards to meet the top point. Crease firmly. You should now have two triangular points sticking upwards.
- Flip the model over.
- Repeat steps 2 and 3 on this side. Fold the bottom edge of the right flap upwards to meet the top point, and then the bottom edge of the left flap upwards to meet the top point.
- Now, let’s form the frog’s front legs. Look at the side of your model. You’ll see a flap on the right and a flap on the left. Take the right flap. Fold the outer edge of this flap inwards to meet the center vertical line. This fold should go from the point where the flap begins to the tip. Crease firmly.
- Repeat with the left flap: fold the outer edge inwards to meet the center vertical line. Crease firmly. These are the frog’s front legs.
- Flip the model over and repeat steps 6 and 7 on this side to create the other set of front legs.
- Now, we’re going to fold the hind legs. Look at the bottom of your model where the two points are. Take the right-hand point. Fold this entire point upwards diagonally, so that the tip of the point aligns with the side edge of the frog’s body, roughly where the front legs begin. Crease firmly.
- Repeat with the left-hand point: fold this entire point upwards diagonally, aligning its tip with the opposite side edge of the frog’s body. Crease firmly. These are the hind legs.
- Flip the model over.
- Repeat steps 9 and 10 on this side. Fold the right bottom point upwards diagonally to align with the side edge, and then the left bottom point upwards diagonally to align with the opposite side edge.
- Now for the jumping mechanism! Look at the bottom of your frog. You should see two points sticking out – these are the hind legs. Take the entire frog model and fold it in half upwards, bringing the bottom point (the tips of the hind legs) up to meet the top point (the nose of the frog). Crease *very* firmly along this fold. This is the “spring” of your frog.
- Turn the frog over so it’s resting on its hind legs. You’ve made your jumping frog!
Common Pitfalls and How to Avoid Them
Even with the clearest instructions, there are a couple of places beginners often get a little tangled. Don’t worry, it’s completely normal, and easy to fix!
- Fussy Folds on the Frog Base: When creating the Frog Base (steps 7-8 in the base folds), the paper can feel a bit stiff and tricky. The key here is to use those pre-made creases to your advantage. Don’t force the paper. Gently guide the edges inwards, allowing the creases to do the work of collapsing the paper into the diamond shape. If it feels like it’s not cooperating, unfold slightly and re-examine the creases you made. Ensuring these creases are sharp is crucial.
- Uneven Leg Folds: For the front legs (steps 6 and 7 in the frog sequence), it’s important that the inner folds are parallel and meet neatly at the center line. If one leg is significantly wider or narrower than the other, your frog might not sit evenly. Aim for symmetry. Similarly, when folding the hind legs (steps 9 and 10), ensure the diagonal folds are mirroring each other on both sides. Take your time and align the edges carefully.
- The “Jump” Fold (Step 13): This is arguably the most important fold for a jumping frog! If this fold isn’t creased *very* firmly, your frog won’t have the necessary spring. When you fold the frog in half upwards, press down with all your might! You can even use a fingernail or a bone folder (if you have one) to really embed that crease. A weak crease here means a weak hop.
Varying Your Frogs: A Splash of Personality
Once you’ve mastered the basic jumping frog, the world of origami is your oyster! Here are some ways to add your own flair:
- Size: As I mentioned, a 6-inch square is a great starting point. But why stop there? Try using larger squares for bigger, more impressive frogs, or smaller squares for a whole army of tiny jumpers. Just be aware that smaller paper can be trickier to fold precisely.
- Paper Pattern: This is where you can really get creative! Use patterned origami paper – floral, geometric, cartoonish – the possibilities are endless. Imagine a frog with a camouflage pattern for a jungle theme, or a bright polka-dot frog for a party! You can even draw your own patterns onto plain white paper before you start folding, or use decorative paper from a craft store.
- Colour: Don’t be afraid to mix and match. Use a bright green for a classic frog, or go for something unexpected like a vibrant blue, a sunny yellow, or even a shimmering metallic. Single-sided paper will give you that lovely contrast where the white peeks through, while double-sided paper will be uniformly coloured.
Displaying and Gifting Your Frogs: Sharing the Joy
These little jumping frogs aren’t just fun to make; they’re also wonderful to share!
- Desk Companions: Place a few frogs on your desk. A gentle tap on their back can send them hopping across your workspace, providing a fun little distraction during a busy day.
- Party Favors: Make a batch of frogs in bright, festive colours for a birthday party. They make excellent, inexpensive party favors that kids (and adults!) will love. You can even have a little “frog jumping contest” at the party!
- Gifts: Tie a few frogs together with a ribbon and present them as a unique and handmade gift. They’re perfect for a friend who loves quirky things, or as a cheerful addition to a get-well-soon care package.
- Seasonal Decorations: Depending on the paper you use, you can adapt these frogs for different seasons. Think patriotic red, white, and blue frogs for a summer celebration, or earthy tones for an autumn display.
- Educational Tool: These frogs are a fantastic way to introduce children to origami and improve their fine motor skills. They’re engaging and reward them with a tangible, fun result.
And there you have it! Your very own easy jumping origami frog. I hope you had as much fun folding it as I do every time I make one. Don’t be discouraged if your first few aren’t perfect – practice makes perfect, and each fold is a step towards mastering this delightful craft. Happy folding, and happy hopping!
Conclusion
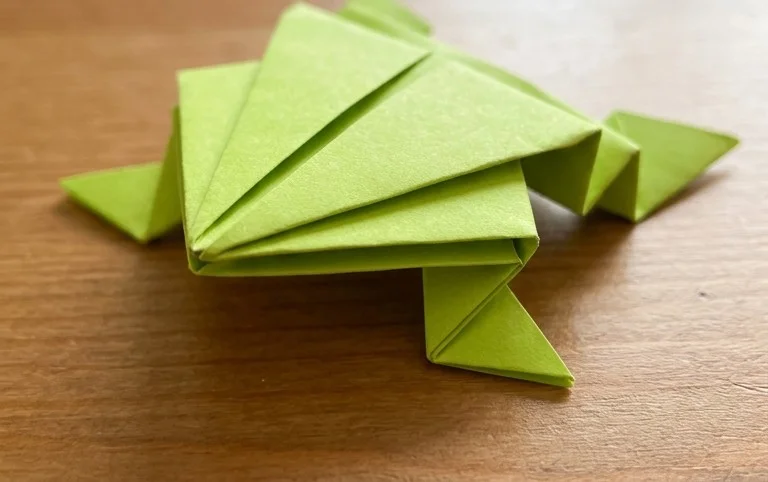
Congratulations on mastering your easy jumping frogs! We hope you had as much fun making them as we did showing you. Don’t worry if your first frog isn’t perfect – every fold is a step in the learning process! Give yourself a pat on the back for completing your origami adventure. Now that you have a delightful froggy friend, why not show it off to your family and friends?
Ready for more paper fun? Try making your jumping frogs in different sizes or using patterned paper for a unique look! You could also explore other classic origami creations. We invite you to dive deeper into the wonderful world of paper crafts and discover even more exciting projects to fold. Happy folding!