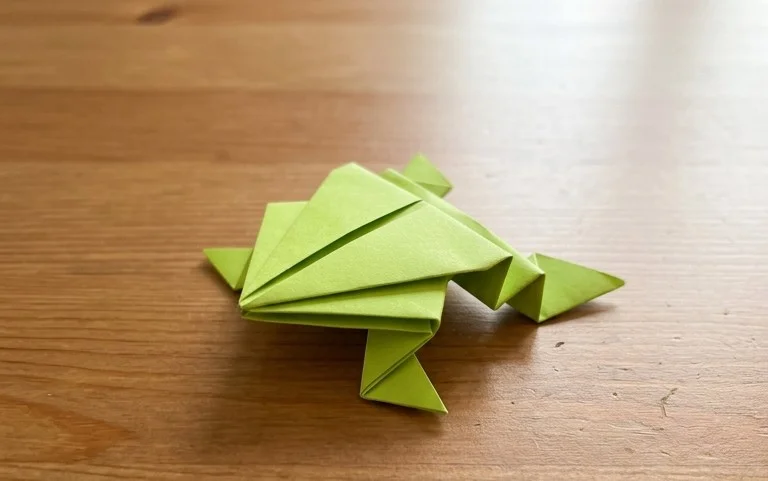
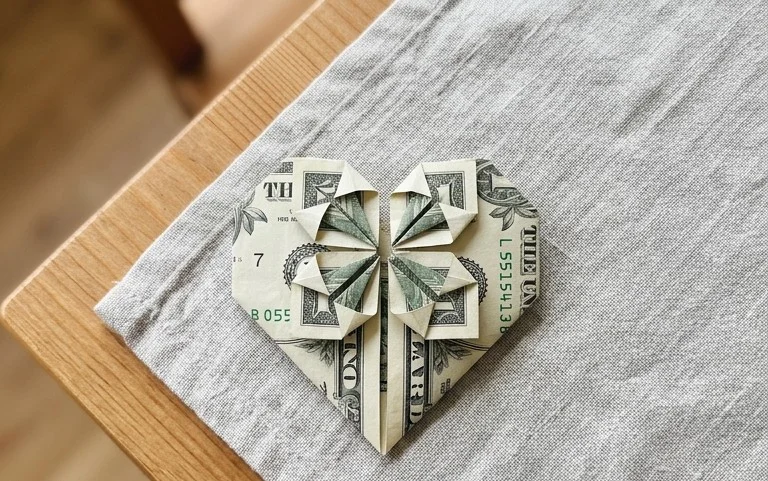
Easy Origami Heart Boat Box: Step-by-Step Paper Craft
How to Make an Origami Heart Boat Box will guide you through creating a charming and versatile origami model. Imagine a delightful little box, shaped like a sweet heart, with gently curved sides that evoke a small, whimsical boat. This project is perfect for absolute beginners and a fantastic activity for kids, making it ideal for creating personalized gifts or adding a decorative touch to any space. In about 10-15 minutes, you’ll have this adorable creation in your hands!
We’ll walk through each fold step-by-step, so don’t worry if you’ve never folded anything before. You’ll learn fundamental origami techniques that are easy to grasp and wonderfully satisfying to execute. Get your paper ready, and let’s embark on this fun and rewarding folding adventure together!
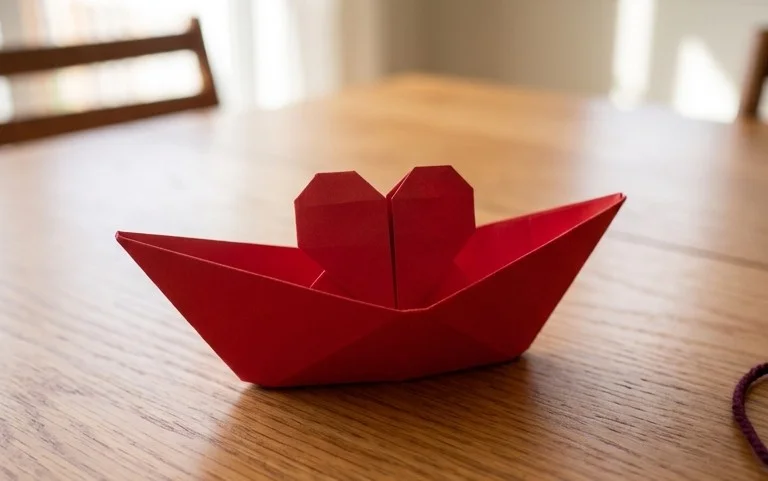
Let’s embark on a delightful origami journey to create an Origami Heart Boat Box! This charming model is not only a beautiful decorative piece but also a functional little container perfect for small gifts or keepsakes. It’s a slightly more involved project than a basic origami heart, but the rewarding result is absolutely worth it. I promise, with a bit of patience and careful folding, you’ll be creating these lovely heart boat boxes in no time.
Choosing Your Paper
The first step to any origami project is selecting the right paper. For this Heart Boat Box, I highly recommend using origami paper.
Type and Weight
Origami paper is specifically designed for folding. It’s thin enough to allow for multiple layers of folds without becoming too bulky, yet strong enough to hold its shape. Standard origami paper is usually around 70-80 gsm (grams per square meter). This weight provides a good balance of crispness and durability. Avoid using thick cardstock, as it will be very difficult to fold accurately and will result in a chunky, less defined model. Regular printer paper can work in a pinch, but it’s often a bit too stiff and can tear more easily.
Size
For beginners, I suggest starting with a larger sheet of paper, such as 6 inches (15cm) or even 8 inches (20cm) square. This gives you more room to maneuver your folds and makes it easier to see where everything is going. As you become more comfortable, you can experiment with smaller sizes.
Single or Double-Sided Paper
This is where you can really play with the aesthetics of your Heart Boat Box!
* Single-sided origami paper has one coloured or patterned side and one white side. When you make folds, the white side will show on the inside of the box. This can create a lovely subtle contrast.
* Double-sided origami paper has the same colour or pattern on both sides. This will give you a consistent colour throughout your finished model, which can be very striking.
For this project, either type will work beautifully. I often enjoy the visual interest that single-sided paper provides, as it adds a hidden layer of colour inside the boat.
The Base Folds: Setting Up for Success
Before we dive into the specific steps for the Heart Boat Box, let’s familiarize ourselves with a couple of foundational folds that are crucial for making clean, precise models. Getting these right will make the rest of the process much smoother.
The Valley Fold
A valley fold is the most common type of fold. Imagine you’re making a crease down the middle of a valley. You’ll bring one edge or corner to meet another edge or corner, and then flatten the paper to create a crease. This crease will form a “V” shape when viewed from the side. When describing a valley fold, I’ll often say something like, “Bring the bottom edge up to meet the top edge.”
The Mountain Fold
A mountain fold is the opposite of a valley fold. Instead of the paper bending inwards, it bends outwards, forming an inverted “V” shape, like the peak of a mountain. Often, you’ll pre-crease a section of paper using a valley fold, and then later reverse that fold to make it a mountain fold. When I instruct you to make a mountain fold, it means you’ll be folding in the opposite direction to a valley fold you might have already made.
Crafting Your Origami Heart Boat Box: A Step-by-Step Guide
Now that we’ve prepared our paper and understand the basic folds, let’s begin!
1. Start with your square piece of paper placed in front of you. If you’re using single-sided paper, place it so the coloured or patterned side is facing *down* on your work surface, and the white side is facing *up*.
2. Make a valley fold by bringing the bottom edge of the paper up to meet the top edge. Crease firmly, then unfold. You should now have a horizontal crease line across the middle of your paper.
3. Now, make a valley fold by bringing the left edge of the paper over to meet the right edge. Crease firmly, then unfold. You should now have a vertical crease line down the middle of your paper. These two creases divide your square into four smaller squares.
4. Bring the bottom edge up to meet the horizontal centre crease you made in step 2. Crease firmly.
5. Now, bring the top edge down to meet the same horizontal centre crease. Crease firmly. Your paper should now look like a narrow rectangle, with the two folded edges meeting in the middle.
6. Turn your paper over.
7. Bring the bottom edge up to meet the top edge. Crease firmly. Your paper is now a much smaller rectangle.
8. Open up the fold you just made in step 7. You should have a horizontal crease across the middle of your current rectangular section.
9. Take the bottom edge and bring it up to meet this horizontal centre crease. Crease firmly.
10. Take the top edge and bring it down to meet the same horizontal centre crease. Crease firmly. At this point, you should have a smaller rectangular shape, with a folded section at the top and bottom, and a central band.
11. Now, we’re going to create the “boat” shape. You’ll see that the top section of your paper has two flaps on either side. Take the top-left flap and fold it diagonally outwards, so its bottom edge aligns with the vertical centre crease. Crease firmly.
12. Repeat step 11 with the top-right flap. Fold it diagonally outwards, aligning its bottom edge with the vertical centre crease. Crease firmly. You should now have two triangular flaps sticking out at the top.
13. Carefully tuck the very tip of each of these top triangular flaps *underneath* the fold you made in steps 11 and 12. This helps to secure the shape and makes it look neater.
14. Now, we need to make the “heart” part of the box. Look at the bottom section of your paper. You’ll see two layers that you folded up in steps 9 and 10. Take the front layer of these bottom flaps and fold it upwards, so the bottom edge comes all the way up to the point where the two diagonal folds meet at the top. Crease firmly.
15. Turn your model over.
16. Take the remaining bottom flap (the back layer from step 14) and fold it upwards, so its bottom edge also meets the point where the two diagonal folds meet at the top. Crease firmly. You now have a shape that resembles the outline of a heart, with a little pocket at the top.
17. Gently open up the pocket at the top of your heart. You can do this by pulling the two sides of the heart outwards. As you open it, the bottom of the model will naturally start to form a box shape.
18. Carefully press down on the bottom edges of the opened pocket to flatten the base of your box. You’re essentially flattening the two layers you folded up in steps 14 and 16 to create the bottom.
19. To make the heart shape more defined, gently push the sides of the top “boat” section inwards. As you do this, the top edges will naturally come together to form the pointed top of the heart.
20. To secure the heart shape, you might find there are small tucks on either side. You can tuck these in neatly.
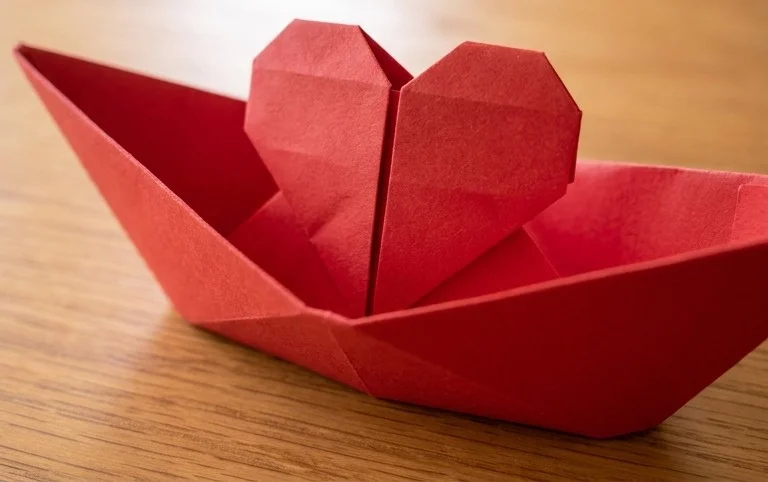
Congratulations, you’ve made an Origami Heart Boat Box!
Common Beginner Pitfalls and How to Avoid Them
Don’t worry if your first few attempts aren’t perfect – origami takes practice! Here are a couple of common mistakes beginners make and how to avoid them:
Creasing Too Lightly or Too Heavily
* **The Problem:** If you don’t crease firmly enough, your folds will be loose and your model will be floppy and won’t hold its shape. On the other hand, if you crease *too* heavily, especially on thinner paper, you risk tearing the paper or making it difficult to make subsequent folds accurately.
* **The Solution:** Use the fingernail of your index finger or a bone folder (if you have one) to run along the edge of each fold. Apply firm, consistent pressure. Think of it as pressing the paper flat, not just lightly touching it. However, be mindful of the paper’s integrity. If you feel the paper is about to tear, ease up slightly. With practice, you’ll develop a feel for the right amount of pressure.
Misaligning Edges and Corners
* **The Problem:** This is probably the most common issue! If your corners don’t meet precisely or your edges aren’t aligned when you make a fold, your entire model will be off-kilter. This can lead to gaps, misformed shapes, and a box that doesn’t close properly.
* **The Solution:** Take your time with each fold. Before you crease, carefully line up the edges or corners. Hold the paper in place with one hand while you make the crease with the other. Don’t rush this step! It’s far better to spend an extra few seconds ensuring accuracy now than to fix a crooked model later. For the central folds (steps 2 and 3), ensure the edges meet exactly in the middle. For folds like step 11, make sure the bottom edge of the flap sits perfectly along the centre crease.
Not Turning the Paper When Instructed
* **The Problem:** Some folds require you to work on different sides of the paper to achieve the desired effect. If you miss a “turn over” instruction, you’ll end up with a shape that doesn’t match the diagram (or, in our case, the description!) and the subsequent steps won’t make sense.
* **The Solution:** Read each step carefully before you perform it. Pay close attention to any instructions that say “Turn your paper over.” Visualize what the paper should look like after each step. If it doesn’t match, it’s likely you missed a turn or made a fold incorrectly.
Varying Your Origami Heart Boat Box
Once you’ve mastered the basic Heart Boat Box, you can have a lot of fun experimenting with variations!
Size
As I mentioned earlier, you can easily change the size of your box by simply starting with a different-sized square of paper. A smaller starting square will result in a smaller, more delicate box, perfect for tiny treasures. A larger square will create a more substantial box, capable of holding a few more items.
Paper Pattern and Colour
This is where you can really let your creativity shine!
* **Patterns:** Think beyond plain colours. Origami paper comes in an incredible array of patterns – floral, geometric, animal prints, and even metallic finishes. A patterned paper can add a unique personality to your box. Consider the occasion when choosing a pattern.
* **Colour Combinations:** If you’re using single-sided paper, the inside colour will be different from the outside. You can choose colours that complement each other, or go for a bold contrast. If you have double-sided paper with different colours on each side, you can sometimes strategically unfold certain parts to reveal the other colour, adding subtle accents.
* **Textured Paper:** Some specialty origami papers have a textured finish, like Washi paper. This can add a beautiful tactile quality to your Heart Boat Box.
Displaying and Gifting Your Finished Model
Your completed Origami Heart Boat Box is more than just a folded piece of paper; it’s a work of art and a thoughtful gesture.
Gifting Ideas
* **Jewelry:** It’s the perfect size for a delicate necklace, a pair of earrings, or a special ring.
* **Candy or Chocolates:** Tuck in a few gourmet candies or a small piece of chocolate.
* **Small Notes or Love Letters:** Write a sweet message or a secret note and place it inside.
* **Craft Supplies:** Offer it filled with a few special beads, buttons, or tiny embroidery floss spools for a fellow crafter.
* **Party Favors:** Make several in coordinating colours and use them as charming favors for weddings, baby showers, or birthdays.
Display Ideas
* **Desk Organizer:** Use it on your desk to hold paperclips, small erasers, or USB drives.
* **Shelf Decor:** Place it on a bookshelf or a decorative shelf as a whimsical accent piece.
* **Table Centerpiece:** Group several Heart Boat Boxes together, perhaps with a few small flowers or decorative stones, for a lovely table display.
* **Seasonal Decor:** Use colours and patterns that match the season or upcoming holidays. Red and green for Christmas, pastels for Easter, or vibrant colours for spring.
I hope you’ve enjoyed learning how to make this delightful Origami Heart Boat Box. Remember, the key to origami is patience and practice. So, don’t be discouraged if your first few attempts aren’t perfect. Keep folding, and you’ll soon be creating beautiful, unique boxes that are sure to bring a smile to anyone who receives them. Happy folding!
Conclusion
Congratulations on completing your origami heart boat box! We hope you enjoyed folding this unique and charming creation. Don’t worry if your first attempt isn’t perfect; every fold is a learning experience, and practice truly makes perfect with origami. Feel free to share your beautiful finished origami heart boat box with friends and family – it makes a delightful handmade gift or decoration. For your next project, consider trying a traditional origami boat or a delicate origami heart. There are countless paper adventures waiting for you. Explore more paper projects and discover the joy of transforming a simple sheet of paper into something magical!