Easy Geometric Origami Boxes: Step-by-Step
Geometrische doosjes zijn een fantastische manier om de wereld van origami te ontdekken, zelfs als je nog nooit eerder een papiertje hebt gevouwen! Stel je voor: strakke lijnen, perfecte hoeken en een schattig, functioneel doosje dat recht uit je handen komt. Deze doosjes zijn ideaal voor complete beginners en ook superleuk voor kinderen om te maken. Ze zijn perfect om te gebruiken als decoratie of om kleine cadeautjes in te verpakken – wie wil er nu niet zo’n zelfgemaakt doosje ontvangen? Binnen zo’n 5-10 minuten tover je al een prachtig doosje tevoorschijn!
In deze tutorial gaan we stap voor stap door de vouwtechnieken. Je leert hoe je met een paar simpele vouwen de mooiste geometrische vormen creëert. Bereid je voor op een ontspannende en creatieve ervaring. Pak een paar velletjes papier en laten we beginnen met vouwen!
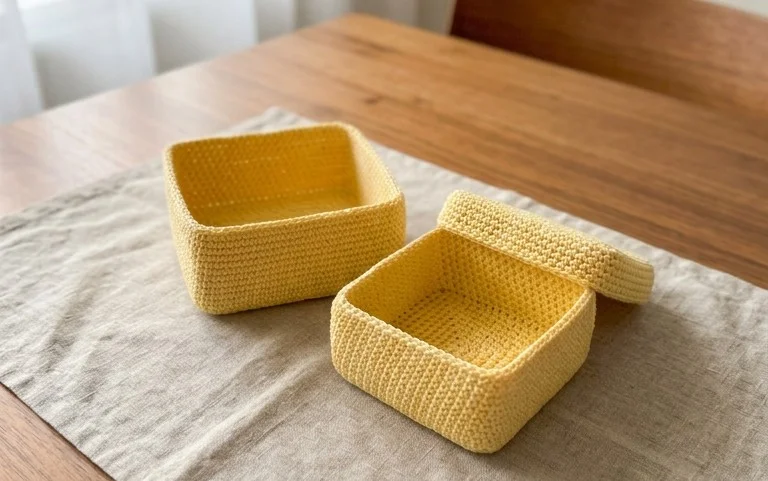
The Wonderful World of Geometric Origami Boxes
Hello there, origami enthusiast! Today, we’re diving into the delightful world of geometric origami boxes. These aren’t just simple containers; they’re elegant, precise little structures that are surprisingly easy to create once you understand the basic principles. They’re perfect for holding tiny treasures, giving small gifts, or simply adding a touch of handmade beauty to your space. As a beginner, you might find the precision of geometric origami a little daunting at first, but I promise you, with a little patience and careful folding, you’ll be creating these charming boxes in no time. Let’s get started!
Choosing Your Paper
The paper you choose is crucial for the success of your origami box. For geometric models like these boxes, the paper needs to hold a crisp crease and be substantial enough to stand up on its own.
* **Type of Paper:** Standard origami paper is your best friend here. It’s designed for folding and comes in a beautiful array of colours and patterns. If you don’t have dedicated origami paper, you can experiment with thin, crisp printer paper, but be aware it might not hold creases as well. Avoid anything too thick or textured, as it will be difficult to fold precisely.
* **Weight:** Aim for paper that’s around 80-100 gsm (grams per square meter). This is a good balance of being sturdy enough for the box to maintain its shape without being too bulky to fold.
* **Size:** For your first few boxes, I recommend starting with a square sheet of paper that’s between 15 cm and 20 cm (6 to 8 inches) on each side. This size is manageable and allows you to practice the folds without feeling cramped. Once you’re comfortable, you can easily scale up or down.
* **Single or Double-Sided:** Geometric boxes often look stunning with a contrasting colour inside and out. Therefore, double-sided paper is ideal. If you only have single-sided paper, that’s perfectly fine too! You can still make beautiful boxes, and the inside will simply be the colour of the paper you chose. The technique remains the same.
The Foundation: Essential Base Folds
Before we begin assembling the box, there are a couple of fundamental folds that form the basis of many geometric origami models. Mastering these will make the rest of the process much smoother. We’ll be working with our square piece of paper, coloured side up if you have one.
1. **Valley Fold in Half (Horizontally and Vertically):**
* Place your square paper in front of you.
* Bring the bottom edge up to meet the top edge precisely. Line up the corners and the edges.
* Crease firmly along the fold. This is a “valley fold” because the crease forms a valley shape when you look at it from the top.
* Unfold the paper.
* Now, bring the left edge over to meet the right edge precisely. Again, line up the corners and edges.
* Crease firmly.
* Unfold. You should now have a horizontal and a vertical crease running through the centre of your square, dividing it into four equal smaller squares.
2. **Valley Fold Diagonally (Both Diagonals):**
* With the paper unfolded, pick it up and turn it so it’s a diamond shape, with one corner pointing towards you.
* Bring the bottom corner up to meet the top corner precisely. Line up the points.
* Crease firmly along the fold.
* Unfold the paper.
* Now, bring the left corner over to meet the right corner precisely. Line up the points.
* Crease firmly.
* Unfold. You should now have two diagonal creases forming an ‘X’ shape across your square.
These four creases (horizontal, vertical, and two diagonals) form a grid on your paper, which will be our guide for the upcoming folds. Make sure these creases are sharp and accurate. They are the backbone of your box!
Step-by-Step Box Construction
Now, let’s transform that creased paper into a beautiful geometric box. We’ll assume you have a double-sided paper and are starting with the coloured side facing up.
1. **Prepare for the Base:** Lay your paper flat so it looks like a diamond (one corner pointing towards you). You should see the four creases we just made, forming an ‘X’ and a ‘+’.
2. **First Corner Fold:** Take the bottom corner (the one pointing towards you) and fold it up so that the tip of this corner meets the exact centre point of the square, where all the creases intersect. Crease firmly. Your paper will now look like a smaller square with a triangle pointing upwards.
3. **Second Corner Fold:** Now, take the right corner and fold it upwards so that its tip also meets the exact centre point. Crease firmly. You will now have two triangles pointing upwards, overlapping slightly at the centre.
4. **Third Corner Fold:** Repeat this process with the top corner. Fold it down so its tip meets the centre point. Crease firmly.
5. **Fourth Corner Fold:** Finally, take the left corner and fold its tip up to meet the centre point. Crease firmly. At this stage, your paper should look like a smaller square, with all four original corners now meeting precisely at the centre. It might feel a little thick at this point, which is normal.
6. **Forming the Sides (First Pair):** We’re going to create the walls of the box. Look at the right flap that you just folded towards the centre. We need to lift this flap upwards. Gently lift the right edge of the paper (the edge of the flap you just folded) and bring it up so that the crease you made in step 3 (the diagonal crease) becomes the top edge of the flap. The point of this flap will be at the centre. You are essentially opening up that corner flap and using its existing crease to form one of the sides of the box. You’ll want to make a new, sharp crease where the bottom edge of this lifted flap now meets the side edge of the main body of the paper. This new crease should run from the centre point outwards towards the right edge of your original square.
7. **Forming the Sides (Second Pair):** Now, look at the flap you folded from the top corner (step 4). We will do the same thing. Lift this flap upwards, using the crease you made in step 2 (the horizontal crease) as the top edge of this new side. Again, make a sharp new crease where the bottom edge of this lifted flap meets the side edge of the main body of the paper. This crease will run from the centre point outwards towards the top edge of your original square.
8. **Forming the Sides (Third Pair):** Repeat this process for the left flap (folded in step 5). Lift it upwards, using the crease made in step 3 (the diagonal crease) as the top edge. Make a new sharp crease where the bottom edge of this lifted flap meets the side edge of the main body. This crease will run from the centre point outwards towards the left edge of your original square.
9. **Forming the Sides (Fourth Pair):** Finally, repeat for the bottom flap (folded in step 2). Lift it upwards, using the crease made in step 3 (the vertical crease) as the top edge. Make a new sharp crease where the bottom edge of this lifted flap meets the side edge of the main body. This crease will run from the centre point outwards towards the bottom edge of your original square.
At this point, you should have a structure with four triangular flaps pointing upwards, forming the sides of your box. It will look like a little house with no roof.
10. **Closing the Box (The Lock):** Now, we need to secure these sides. Look at the right triangular flap. We’re going to fold it downwards, tucking its tip into the pocket formed by the flap to its left (the one you lifted in step 8). The crease for this fold should align with the top edge of the flap it’s tucking into. Press down firmly to lock it in place.
11. **Closing the Box (The Second Lock):** Repeat this for the top triangular flap. Fold it downwards and tuck its tip into the pocket formed by the flap to its bottom. The crease for this fold should align with the top edge of the flap it’s tucking into. Press down firmly.
12. **Closing the Box (The Third Lock):** Do the same for the left triangular flap. Fold it downwards and tuck its tip into the pocket formed by the flap to its right. The crease for this fold should align with the top edge of the flap it’s tucking into. Press down firmly.
13. **Closing the Box (The Final Lock):** Lastly, fold the bottom triangular flap downwards and tuck its tip into the pocket formed by the flap to its top. The crease for this fold should align with the top edge of the flap it’s tucking into. Press down firmly.
Congratulations! You have just folded a beautiful geometric origami box. You can gently puff out the sides to give it more volume and shape.
Common Beginner Pitfalls and How to Avoid Them
Even with clear instructions, there are a few places where beginners often get stuck. Don’t worry if you encounter these; they are completely normal!
* **Inaccurate Centre Point Alignment:** In steps 2 through 5, where you fold each corner to the exact centre, precision is key. If your corners aren’t meeting the centre perfectly, your subsequent folds will be off, and the box might not close properly or look neat.
* **How to avoid:** Before creasing firmly, take a moment to adjust the corner so it sits precisely on the intersection of your creases. You can even place a finger very lightly on the centre point to guide the corner.
* **Soft or Messy Creases:** Geometric origami relies on sharp, defined creases to hold its shape. If your creases are weak or wobbly, the box will likely collapse or look unkempt.
* **How to avoid:** Use your fingernail or a bone folder (if you have one) to run firmly along each crease. Make sure you’re pressing down hard enough to create a defined line.
* **Difficulty with the “Locking” Folds:** Steps 10 through 13, where you tuck the flaps into the pockets, can be tricky. Sometimes the flaps don’t want to slide in easily, or they end up creased in the wrong place.
* **How to avoid:** Before tucking, gently open up the pocket slightly. Carefully guide the tip of the flap into the pocket, ensuring the crease you’re making aligns with the top edge of the pocket. Sometimes a little wiggle is all it takes. Don’t force it; if it’s not going in, re-examine your previous folds to see if something is blocking it.
Variations to Explore
Once you’ve mastered the basic geometric box, the possibilities are endless!
* **Size:** As mentioned, simply start with a larger or smaller square piece of paper. The proportions of the box will remain the same. For very small boxes, consider using thinner paper. For larger ones, a slightly heavier paper might be beneficial.
* **Paper Pattern and Colour:** This is where you can truly let your creativity shine!
* **Patterns:** Use paper with beautiful patterns – floral, geometric, novelty prints – for a unique look.
* **Two-Tone:** If you use single-sided paper, you can alternate colours by starting with the white side up for one box and the coloured side up for the next. You can also experiment with paper that has a different colour on each side.
* **Metallic or Textured Paper:** For special occasions, try metallic or subtly textured papers for an extra touch of elegance.
* **Adding a Lid:** This basic design can be adapted to create a lid. You’ll typically need two squares of paper, one slightly larger than the other. The smaller square is folded into the box, and the larger one is folded into a slightly taller version to act as the lid. The process is very similar, but the measurements and proportions are key.
Displaying and Gifting Your Creations
These geometric origami boxes are not just functional; they’re also beautiful decorative pieces.
* **Gift Packaging:** They are perfect for presenting small gifts like jewelry, candies, special coins, or even a folded heartfelt note. Imagine giving a handmade engagement ring box!
* **Desk Organizers:** Use them on your desk to hold paperclips, pins, erasers, or small beads.
* **Party Favors:** Fill them with small treats or trinkets for a unique party favor.
* **Decorative Accents:** Arrange a collection of boxes in different sizes and colours on a shelf or mantelpiece for a striking visual display.
* **Holiday Decorations:** Use festive-coloured paper for Christmas, Halloween, or Easter themed boxes.
I hope you’ve enjoyed this journey into creating geometric origami boxes. With a little practice, you’ll find yourself folding these beautiful little structures with ease and delight. Happy folding!
Conclusion
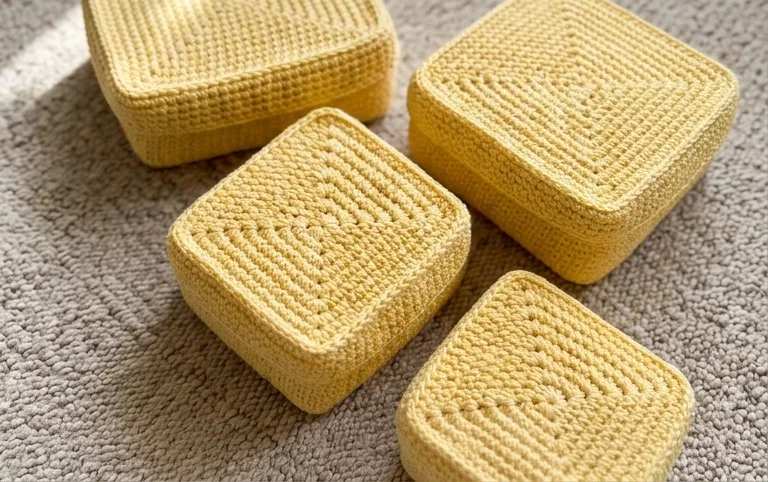
Congratulations on folding your very own geometric doosjes! We hope you enjoyed this paper crafting adventure. Don’t worry if your first attempt isn’t perfect; every fold is a learning opportunity. The beauty of origami lies in the practice and the process. We encourage you to try folding more of these versatile geometric doosjes! Perhaps you could experiment with different sizes or even use patterned paper for a unique look. For your next project, why not try folding a more complex origami animal or an elegant paper flower? There are countless paper projects waiting to be discovered!
Next Steps:
Try folding a geometric doosje with a contrasting paper color inside and out.
Challenge yourself with a slightly more intricate geometric origami design.
