Easy Origami Pocket: Step-by-Step Paper Craft
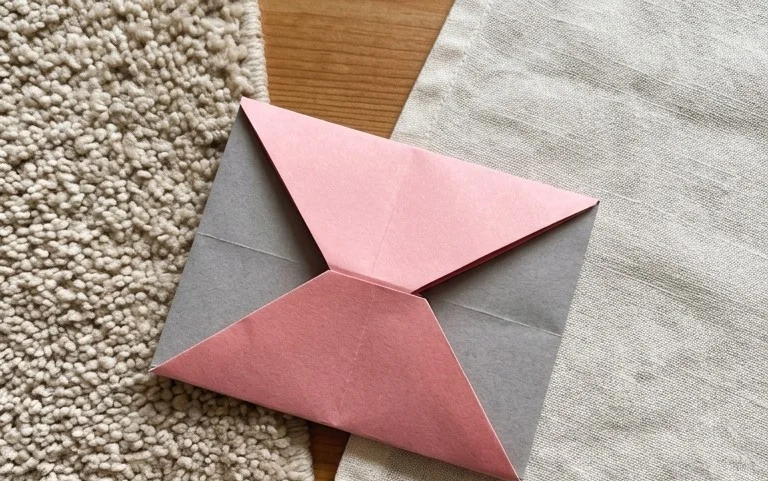
Origami Pocket tutorials are a fantastic way to learn the art of paper folding! Today, we’re going to create a super handy and surprisingly simple origami pocket. Imagine a neat, flat pouch with a crisp, clean opening – perfect for tucking away little notes, a small treat, or even a gift card. This project is absolutely ideal for complete beginners, young crafters, or anyone looking for a quick and charming way to add a handmade touch to their gifts or decorations. In just about 5-10 minutes, you’ll master the basic folds needed to bring this useful little creation to life. Get ready to transform a flat piece of paper into something both functional and fun!
Origami Pocket: Step-by-Step Instructions
Hello fellow paper enthusiasts! Today, we’re going to learn how to fold a delightful and incredibly useful origami pocket. This is a fantastic project for beginners, and the finished product is so handy for storing small notes, gift cards, or even as a decorative element. We’ll go through everything step-by-step, so don’t worry if you’re new to origami – I’ll guide you through each fold with clear, plain language.
Choosing Your Paper: The Foundation of Your Pocket
Before we begin folding, let’s talk about the most important ingredient: your paper! The right paper makes all the difference in how your origami pocket turns out.
For this pocket, I recommend using standard origami paper. If you don’t have dedicated origami paper, regular printer paper can also work, but it will be a bit stiffer and might not hold creases as crisply.
Let’s break down the ideal paper characteristics:
- Type: Origami paper is typically a thin, strong paper that holds creases well. It’s often made from kozo (mulberry bark) or spruce pulp.
- Weight: A good weight for this pocket is around 70-80 gsm (grams per square meter). This is a common weight for printer paper and standard origami paper. Avoid paper that is too thick, as it will be difficult to fold accurately, and paper that is too thin, as it might tear easily.
- Size: For a beginner-friendly size that results in a good-sized pocket, I recommend starting with a square piece of paper that is 6 inches by 6 inches (or approximately 15 cm by 15 cm). This size is common for origami paper packs and produces a pocket that’s a comfortable size for many uses. You can certainly use larger or smaller squares, but the proportions of the finished pocket will change.
- Single or Double-Sided: You can use either single-sided or double-sided paper. If you use single-sided paper (one color on one side, white on the other), decide which color you want to be the *inside* of your pocket. We’ll start with that colored side facing down. If you use double-sided paper, it doesn’t matter which side you start with facing up or down, as both sides will be visible.
Make sure your paper is a perfect square. If you’re cutting your own from larger paper, carefully measure and cut to ensure the edges are straight and the corners are right angles. A crisp square is the starting point for all good origami!
The Base Folds: Building a Strong Foundation
Before we get into the pocket-specific folds, we’ll make a couple of fundamental folds that create guidelines and structure. Making these folds cleanly is crucial for the entire process.
Let’s get our paper ready. Place your square piece of paper in front of you. If you’re using single-sided paper, place the colored side facing *down*, so the white side is facing up.
Step-by-Step Folding Sequence
Now, let’s begin folding our origami pocket! I’ll guide you through each step in plain language. Take your time, and don’t rush.
1. Start with your square piece of paper in front of you, white side up (if using single-sided paper).
2. Fold the paper in half diagonally. Take the bottom right corner and bring it up to meet the top left corner. Press down firmly along the fold line to create a crisp crease. You should now have a triangle with the long edge at the bottom.
3. Unfold the paper. You’ll see a diagonal crease running across your square.
4. Now, fold the paper in half along the *other* diagonal. Take the bottom left corner and bring it up to meet the top right corner. Press down firmly along this new fold line to create another crisp crease.
5. Unfold the paper again. You should now have two diagonal creases that intersect in the center of your square, forming an ‘X’.
6. Flip your paper over so the colored side is now facing up (or both sides are visible if you’re using double-sided paper).
7. Fold the paper in half horizontally. Take the bottom edge and bring it up to meet the top edge. Press down firmly along the fold line to create a crisp crease.
8. Unfold the paper. You’ll see a horizontal crease across the middle.
9. Now, fold the paper in half vertically. Take the left edge and bring it to meet the right edge. Press down firmly along this fold line to create a crisp crease.
10. Unfold the paper. You should now have a horizontal and a vertical crease, forming a ‘+’ shape in the center, in addition to the diagonal creases.
11. With the colored side still facing up, bring the bottom edge up to meet the horizontal crease you made in step 7. Align the edge perfectly with the crease and press down firmly to create a new crease. This will be the bottom edge of your pocket.
12. Now, take the top edge of the paper and fold it down to meet the horizontal crease you made in step 7. Align the edge perfectly with the crease and press down firmly to create a new crease. This fold should overlap the fold you made in step 11.
13. At this point, your paper should be creased in a way that creates four flaps meeting at the center. We are going to use these creases to form the sides of our pocket.
14. Look at the left side of your paper. You’ll see a vertical crease. Fold the left edge inwards along this vertical crease. Bring the left edge to meet the center vertical crease. Press down firmly.
15. Repeat step 14 on the right side. Fold the right edge inwards along the vertical crease to meet the center vertical crease. Press down firmly. You should now have a shape that looks a bit like a flattened diamond with the top and bottom edges still open.
16. Now, let’s form the actual pocket. Take the bottom point (the one closest to you) and fold it upwards. The tip of this point should align with where the two diagonal creases meet at the center of the paper. Press down firmly to create a new crease. This fold creates the base of your pocket.
17. Look at the top of your paper. You’ll have two flaps that are folded down. Take the top layer of these two flaps and fold them downwards. The fold line should be along the top edge of the section you just folded up in step 16. Press down firmly. This creates the opening of your pocket.
18. Turn your origami pocket over. You should now have a neat, flat pocket shape. The colored side (or the side you chose to be visible) will be on the outside, and the opening will be at the top.
Congratulations! You’ve successfully folded your first origami pocket. You should have a lovely, crisp pocket that’s ready to be used.
Common Beginner Pitfalls and How to Avoid Them
Even with the clearest instructions, it’s easy for beginners to run into a few common issues. Don’t get discouraged if you encounter these; they are completely normal when you’re learning!
- Fuzzy or Uneven Creases: This is the most common problem. If your creases aren’t sharp, your folds won’t align properly, and the final model will look messy.
- How to Avoid: Use the tip of your fingernail or a bone folder (if you have one) to really press down along every fold line. Make sure the edges and corners you are bringing together are precisely aligned *before* you crease. Take your time with each crease; it’s better to be slow and accurate than fast and sloppy.
- Misaligned Corners and Edges: This often happens if you’re not careful during the initial base folds (steps 2, 4, 7, and 9).
- How to Avoid: When folding one corner to another or one edge to another, hold the two points or edges together firmly and make sure they are perfectly touching before you start to crease. Visually check that there’s no gap or overlap.
- The Pocket Opening Isn’t Even: This can occur if the fold in step 17 isn’t perfectly aligned.
- How to Avoid: When folding the top flaps down in step 17, make sure the fold line you are creating runs parallel to the edge you just folded up in step 16. Aligning this new fold precisely will ensure the pocket opening is neat and even.
Remember, practice makes perfect! The more you fold, the better you’ll become at making those precise folds.
Varying Your Origami Pocket
The beauty of origami is its versatility! Once you’ve mastered the basic pocket, you can easily change its appearance.
- Size: As mentioned earlier, you can use any size square paper. A larger square will result in a larger pocket, and a smaller square will create a miniature version. Just make sure to maintain the square shape.
- Paper Pattern: This is where you can get really creative!
- Double-Sided Patterned Paper: Use paper with different patterns on each side for a visually interesting effect. You can choose how the inner and outer patterns will interact.
- Themed Papers: Think about seasonal papers (Christmas, Halloween), papers with geometric patterns, floral designs, or even papers with text. This makes the pocket suitable for specific occasions.
- Washi Tape: For a unique touch, you could even use plain colored paper and then apply decorative washi tape to the outside after folding.
- Color: The obvious variation is color! Choose colors that suit your purpose – bright and cheerful for a gift, sophisticated for a formal note, or calming for a personal touch.
Don’t be afraid to experiment. Try folding a few pockets with different papers to see which effects you like best.
Ideas for Displaying or Gifting Your Finished Pocket
Your finished origami pocket is more than just a folded piece of paper; it’s a little piece of art with practical applications.
- Gift Card Holder: This is a perfect, personal way to present a gift card. Simply slip the gift card inside the pocket. You can even write a small message on the back of the card or on a tiny slip of paper tucked inside.
- Note Holder: Keep one on your desk to hold important sticky notes or small reminders. It adds a touch of order and charm to your workspace.
- Party Favors: If you’re hosting a party, fold several pockets using festive paper. Fill them with small candies, a tiny treat, or a thank-you note for your guests.
- Scrapbooking Embellishment: Use your pocket as a decorative element in a scrapbook. You can tuck photos, tickets, or small mementos inside.
- Business Card Holder: For a unique and memorable way to share your contact information, keep a few pockets handy with your business cards inside.
- Decorative Accent: Folded in a beautiful paper, these pockets can simply be displayed as part of a decorative arrangement on a shelf or table.
I hope you’ve enjoyed learning how to fold this versatile origami pocket. It’s a simple fold that opens up a world of possibilities. Keep practicing, keep folding, and most importantly, have fun with your paper creations!
Conclusion
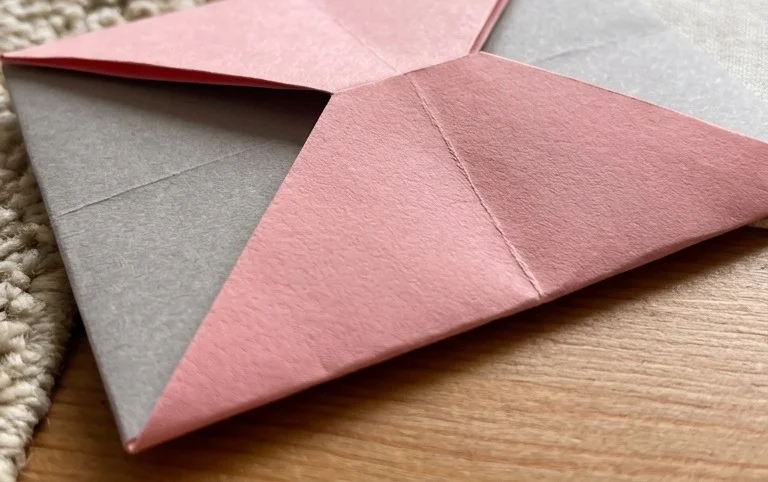
Congratulations on folding your very own origami pocket! We hope you enjoyed this simple yet satisfying project. Don’t worry if your first attempt isn’t perfect – every fold is a learning experience, and the beauty of origami is that practice makes progress. We’d love to see your finished creation, so feel free to share your origami pocket with friends or family!
Ready for more? Try making your pocket from patterned paper or experiment with a slightly larger sheet for a bigger container. Once you’ve mastered this origami pocket, why not explore other fun paper projects? There’s a whole world of creative possibilities waiting for you!