200+ Easy Origami Step-by-Step for Beginners
200+ Easy Origami Instructions for Beginners are about to transform a simple sheet of paper into something magical! Imagine holding a perfectly folded, charming little crane in your hand, its wings poised as if ready for flight, or a delicate, blooming lotus flower ready to grace your desk. These instructions are crafted with you in mind, the absolute beginner, and are fantastic for kids looking for a fun afternoon activity, or for anyone wanting to create unique, handmade gifts or delightful decorations for their home. Most of these models can be completed in just a few minutes, making it easy to build a whole collection in no time!
Throughout this tutorial, you’ll learn the foundational folds and techniques that are the building blocks of origami. We’ll start with the basics, building your confidence with each satisfying crease, and gradually guide you through creating an amazing array of adorable animals, classic shapes, and intricate designs. Get ready to unleash your creativity – your paper adventure begins now!
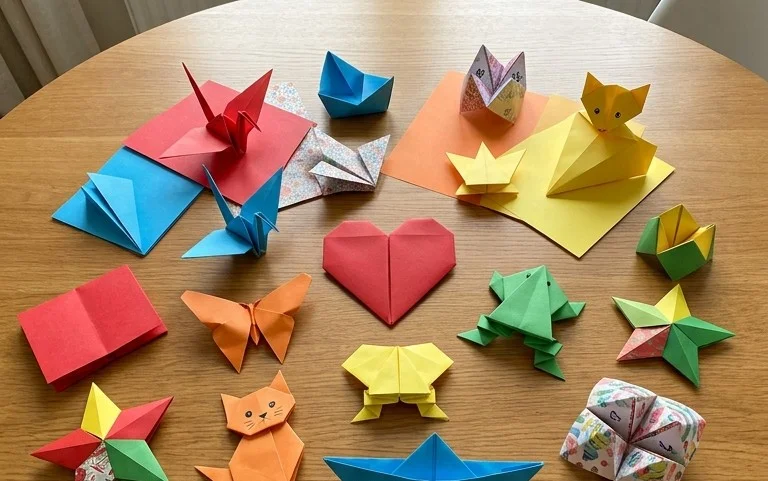
Welcome to the Wonderful World of Origami!
Hello there, budding origami artist! I’m so excited you’re here to start your origami journey with me. Origami, the ancient Japanese art of paper folding, is a truly magical craft. It’s incredibly rewarding to transform a flat sheet of paper into a beautiful three-dimensional object with nothing more than your hands and a bit of patience. This tutorial is designed specifically for absolute beginners, meaning we’ll cover everything you need to know from choosing your very first piece of paper to understanding common pitfalls and how to avoid them.
By the end of this guide, you’ll be equipped to create a variety of delightful models. We’ll break down each step clearly and gently, ensuring you feel confident and capable. So, let’s dive in and discover the joy of folding!
Choosing Your First Origami Paper
The paper you use can make a big difference in your origami experience. For beginners, I highly recommend starting with a paper that’s easy to work with, forgiving of small mistakes, and readily available.
Type of Paper
The most common and ideal paper for beginners is called “kami” paper. This is specifically designed for origami. It’s usually coloured on one side and white on the other, which can be very helpful when learning as it makes it easier to see which side you’re working with. Kami is thin enough to fold multiple layers without becoming too bulky, yet strong enough to hold creases well.
Weight of Paper
Origami paper typically ranges from around 60 gsm (grams per square meter) to 80 gsm. For beginners, a paper around 70-80 gsm is perfect. It has a nice weight, feels good in your hands, and holds creases crisply without tearing too easily. Avoid very thin tissue paper or very thick cardstock when you’re starting out.
Size of Paper
The standard size for origami paper is 15cm x 15cm (about 6 inches x 6 inches). This size is manageable for most beginner models and allows you to practice precise folds without feeling overwhelmed by a large sheet. As you get more comfortable, you can experiment with larger or smaller sizes.
Single or Double-Sided Paper
As I mentioned, kami paper is often single-sided, meaning it’s coloured on one side and white on the other. This is fantastic for learning because it helps you track which side is up and which side is down as you fold. If you choose double-sided paper, where both sides are coloured, that’s also perfectly fine! It can lead to some really beautiful, uniform-coloured finished models.
Mastering the Base Folds: Your Origami Foundation
Before we dive into specific models, let’s get familiar with a few fundamental folds. Practicing these will make following any origami instruction a breeze. The key to clean folds is precision and a sharp crease. Use your fingernail or a bone folder (if you have one) to press down firmly along each fold line.
The Valley Fold
A valley fold is the most basic fold. Imagine folding a piece of paper in half to make a tent shape. The crease you create forms a “valley” when you look at it from above. To make a valley fold, you bring one edge or corner to meet another edge or corner, and then press down firmly along the line where they meet.
The Mountain Fold
A mountain fold is the opposite of a valley fold. Imagine folding a piece of paper in half the other way, so the crease forms an upside-down “V” or a “mountain ridge” when viewed from above. To make a mountain fold, you typically fold the paper away from you, bringing an edge or corner towards you and then creasing. Often, you’ll make a valley fold first, then flip the paper over and fold along the same line, which creates a mountain fold.
The Inside Reverse Fold
This fold is a bit more advanced but incredibly useful. Imagine you have a flap sticking out. To perform an inside reverse fold, you first make two diagonal creases to create a small triangular section at the tip of the flap. Then, you open up that section slightly and push the tip inwards, tucking it between the layers of paper. The result is that the flap folds inwards on itself. It’s often used to create things like bird heads or legs.
The Outside Reverse Fold
Similar to the inside reverse fold, but the opposite direction. You create two diagonal creases, open the flap slightly, and then fold the tip outwards and upwards. This is also frequently used for creating pointed features.
Let’s Fold! A Simple Crane Tutorial
The crane is one of the most iconic origami figures, and it’s a perfect model to start with. It involves several fundamental folds we just discussed.
Let’s assume you have a square piece of paper. For this tutorial, I’ll describe the steps assuming your paper is coloured on one side and white on the other, and you are starting with the coloured side facing up.
- Prepare the Square: Start with your square piece of paper coloured side up.
- First Diagonal Fold: Bring the bottom right corner up to meet the top left corner. Press firmly to create a crease. You should now have a triangle with the coloured side showing on the outside.
- Second Diagonal Fold: Unfold the paper. Now, bring the bottom left corner up to meet the top right corner. Press firmly to create another crease. Unfold. You should now have two diagonal creases forming an “X” across your square.
- Flip the Paper: Turn your paper over so the white side is facing up.
- First Horizontal Fold: Bring the bottom edge up to meet the top edge. Press firmly to create a horizontal crease. Unfold.
- Second Horizontal Fold: Bring the left edge over to meet the right edge. Press firmly to create a vertical crease. Unfold. You should now have a grid of creases on your paper.
- Form the Preliminary Base: This is where it gets interesting! Hold the paper with the white side still facing up. Gently push the left and right sides inwards along the horizontal and vertical creases you just made. As you do this, the top point will naturally come down. Flatten the paper down. You should end up with a smaller square, with all the raw edges meeting at the bottom point. This is called a preliminary base.
- Fold the Flaps (Front): Now, with the open end of your preliminary base pointing towards you (the side with all the flaps), take the top layer of the right flap. Fold its bottom edge inwards to meet the centre vertical crease. Make a sharp crease.
- Repeat for the Left Flap: Now take the top layer of the left flap. Fold its bottom edge inwards to meet the centre vertical crease. Press firmly. You should now have a kite shape on the top layer.
- Fold Down the Top Triangle: You’ll see a small triangular flap pointing upwards at the top of the kite shape. Fold this triangle downwards along the line where the two side flaps meet. Crease firmly, then unfold this small triangle.
- Unfold the Side Flaps: Now, unfold the two side flaps you folded in steps 8 and 9. You should see the creases you made.
- The Petal Fold (Front): This is a key step! Lift the very bottom point of the top layer of paper upwards. Use the creases you made in steps 8 and 9 to guide this. As you lift, the sides should naturally fold inwards along those creases, and the top point will fold down along the crease you made in step 10. Flatten the paper into a diamond shape. This is called a petal fold.
- Repeat on the Back: Turn the entire model over. Repeat steps 8 through 12 on this side. You should now have a diamond shape with two “legs” at the bottom.
- Fold the Legs Inwards (Front): With the diamond shape facing you and the two “legs” pointing downwards, take the right leg. Fold its outer edge inwards to meet the centre vertical crease. Crease firmly.
- Repeat for the Left Leg: Take the left leg. Fold its outer edge inwards to meet the centre vertical crease. Crease firmly.
- Repeat on the Back: Turn the model over and repeat steps 14 and 15 on the other side. You should now have a thinner diamond shape with two pointy “legs” at the bottom.
- Fold Up the Legs: Now, take the right leg and fold it upwards at an angle. This will become one of the crane’s wings. Crease firmly.
- Repeat for the Left Wing: Take the left leg and fold it upwards at an angle, mirroring the first wing. Crease firmly.
- Prepare the Head: You’ll have two pointy “necks” sticking up between the wings. Choose one of these to be the head. Make a small inside reverse fold to create the crane’s head. To do this, gently pull the tip of the neck outwards, make a small crease about halfway down the tip, then push it back in and downwards, tucking it between the layers to form a beak.
- Fold Down the Wings: Gently pull the wings downwards, creasing them slightly where they meet the body.
- Admire Your Crane! You’ve just folded an origami crane! Gently puff out the body by pulling the wings slightly apart to give it a three-dimensional look.
Common Beginner Mistakes and How to Avoid Them
Don’t worry if your first few attempts aren’t perfect – that’s part of the learning process! Here are some common hurdles beginners face and how to overcome them:
- Fuzzy or Sloppy Folds: This is probably the most common issue. It happens when you don’t press your creases firmly enough, or when your folds aren’t aligned precisely.
- How to avoid: Take your time! Line up edges and corners as perfectly as you can before creasing. Use your fingernail or a bone folder to make sharp, decisive creases. Don’t be afraid to press down.
- Misinterpreting Fold Direction (Valley vs. Mountain): Sometimes it’s hard to tell whether a fold should go in or out.
- How to avoid: Pay close attention to the wording. “Bring X to meet Y” usually implies a valley fold. If you’re unsure, or if a step seems to be creating a “hump” where you expect a “valley,” try flipping the paper over and performing the fold in the opposite direction. The white side of kami paper is your friend here – it makes it easier to see which side you’re folding.
- Tearing the Paper: This can happen if you’re using paper that’s too thin, or if you’re forcing folds in areas with too many layers.
- How to avoid: As mentioned, use appropriate beginner paper (70-80 gsm kami). Also, be gentle. If a fold feels like it’s resisting too much, check if you’ve misaligned something or if there’s a better way to approach it. Don’t force it.
Making it Your Own: Variations and Personalization
Once you’ve mastered a few basic models, the fun really begins with personalization!
Varying Size
Origami paper comes in many sizes. If you have a large sheet, you can create a dramatic, impressive version of a model. Smaller sheets are great for creating a collection of tiny, intricate figures. Just remember that as the paper size decreases, the precision required for folds increases.
Paper Patterns and Colours
This is where you can truly let your creativity shine!
- Patterns: Look for origami paper with beautiful patterns – floral, geometric, animal prints, you name it! These can make your finished models incredibly eye-catching.
- Colours: Don’t be afraid to experiment with different colour combinations. You can use a single colour, or if you’re using double-sided paper, you can strategically choose which side faces out for different parts of the model. For example, some models look stunning with a contrasting colour for the inside of a fold.
- Non-Origami Paper: As you become more experienced, you can try folding with other types of paper. Magazine pages, wrapping paper, or even plain printer paper can work, though they might require more care and may not hold creases as well as dedicated origami paper.
Displaying and Gifting Your Creations
Finished origami models are wonderful not just to make, but also to share!
Display Ideas
- Desk Companions: Place a single, well-folded model on your desk or shelf as a cheerful reminder of your crafting.
- Garlands and Mobiles: String together multiple models of the same type (like cranes!) to create beautiful garlands or mobiles for a child’s room or a festive decoration.
- Dioramas: Incorporate your folded figures into small scenes or dioramas. A folded animal could be part of a miniature forest, for instance.
- Framed Art: For particularly intricate or special models, consider framing them under glass to preserve them and display them as art.
Gifting Ideas
- Handmade Gifts: A beautifully folded origami model makes a heartfelt, personal gift. A crane is often associated with good luck and longevity, making it a perfect gift for a friend or loved one.
- Gift Toppers: Use a small, folded model as a unique and memorable topper for a present instead of a traditional bow.
- Stationery: Attach a folded figure to a card or a letter for an extra special touch.
- Party Favors: For a themed party, giving each guest a small origami creation can be a delightful surprise.
I hope this detailed guide has demystified the initial steps of origami for you. Remember, the most important thing is to enjoy the process. Don’t be discouraged by imperfections; each fold is a learning opportunity. Happy folding, and I can’t wait to see what you create!
Conclusion
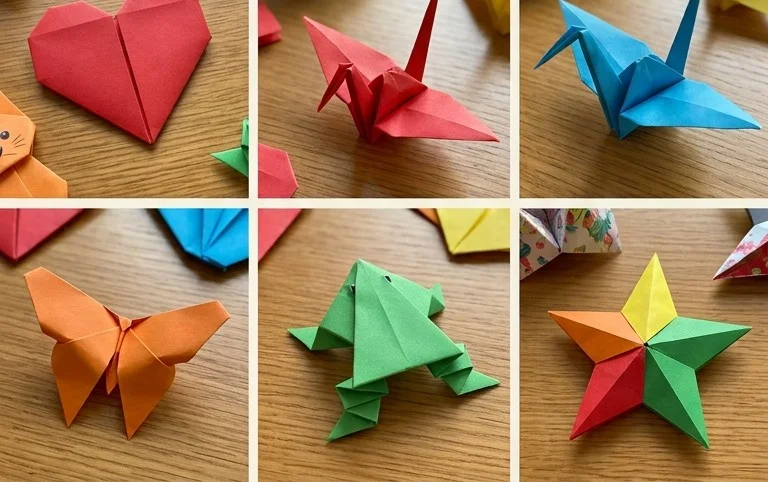
Congratulations on reaching the end of this comprehensive guide to easy origami! Remember, every fold is a step forward, and your first attempt is simply practice for the next beautiful creation. Don’t be discouraged if it’s not perfect; the joy is in the process. Once you’ve folded your model, why not share its charm with a friend or family member? For your next adventure, try folding a simple crane or a playful flapping bird. This is just the beginning of your paper folding journey. We hope you’ll explore many more delightful paper projects!
